
When I asked Lindsay of The Cottage Home if she would participate in Once Upon a Thread and she said yes, she knew exactly what she would do, I was so excited that she chose a classic book to use as her muse.

Because that's exactly the word that comes to mind when I think of Lindsay's work: classic.

She and I love us some good piping and trim. You can tell from these two dresses that she has an affinity for patterned fabric and has a whole lot of fun putting them together. I appreciate and admire her meticulousness in her work, because sometimes it's all in the details.

This was one of my favorites of Lindsay's during Project Run and Play:

Welcome, Lindsay!
* * *

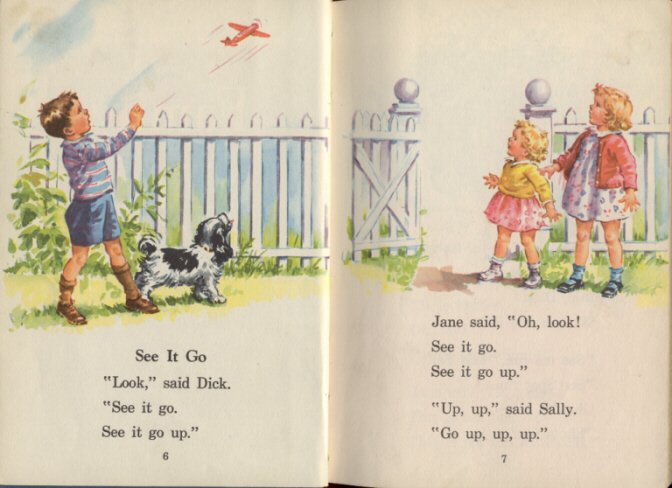
To me, the "Dick and Jane" books are the epitome of retro, children's storybook classics. The images in these books bring me such comfort. They remind us of simpler times, they remind us when life was slower and more easy going. I often wonder if I was born during the correct time period because it seems that everything vintage always has a soft-spot in my heart.
I personally did not grow up with the "Dick and Jane" book series, but my mom grew up learning to read from "Dick and Jane" books. The books contain simple words with simple images, perfect for the new reader.

One of the most enjoyable parts of looking through these old classics are the illustrations of the children's clothing. If you've ever been to my blog or etsy shop, you know that I love classic children's clothing so this time period is right up my alley!
I chose to do a "Dick and Jane" inspired look because I love sweet, classic, feminine dresses on little girls which is what Jane is all about. So I guess we could say I came up with a "Jane" inspired look, since I have two daughters - no boys to model for me - although, I am pregnant so maybe baby number three will be my boy inspiration.

This entire dress (aside from the notions and the lining) was made from a $1.49 full-sized sheet that I found at my local thrift store last weekend. I was waiting for some inspiration for this look and the sheet did the trick. I love the pretty floral as well as the vintage feel I get from the sheet. The scalloped edging was another vintage touch that I thought would be perfect for the "Jane" look - I can just see her wearing this dress in one of those books.

The above picture is the sheet prior to being turned into the dress. It had this fabulous border across the top and little flowers on the rest of the sheet.


I thought I would show you today how to embellish the bodice of a dress. You can take any tank dress pattern that you love and change up the bodice to make it your own. If you don't have a bodice pattern that you really like, you can print my party dress pattern HERE and use that pattern.

The main, featured trim on this dress is this pink picot edge trim. You can buy this online or you may be able to find it in your local fabric shop. Since the lines of this dress were very classic, I wanted to make sure the trims were as well.

Cut four pieces of trim that are the same height as the bodice. I like to cut mine a little longer just to be safe.

Next, grab your Wonder-Tape. My blog readers are probably so sick of hearing me talk about this product but it is one of my absolute favorites! This is a double-sided tape for fabric that disappears in the wash. You can use it to secure any trims that may be difficult to pin or where pin marks might show. I find it holds trims with much more precision than pins - I use this on my piping as well. You can definitely pin if you don't have this product, but I think this makes life SO much easier.
Apply your Wonder-Tape to the back-side of each piece of trim. When you are ready to put your trim in place, remove the paper backing.

Apply your first two pieces of picot edging with the scalloped edging pointing outward. Stitch down each piece of trim in coordinating thread. I stitched close to the scalloped edge because your second piece will end up catching the other side.

Next, place your second piece of picot trim on top of the first. Make sure to line it up perfectly so you can't see the plain edge of the first piece. Stitch down the side close to the scallop edge.

Take a piece of coordinating fabric to use as your center focal point of the bodice. I used two pieces since the sheet fabric was fairly thin, but you could definitely just use one and press the edges under. To use the two pieces, measure the distance between your trims and add enough to account for your seam allowance - I used 1/4". Stitch both pieces of fabric together leaving the top and the bottom open. Turn right-side out and press.

Place your fabric in the middle of your trims and stitch into place. You can leave the top and bottom edge raw because that will become concealed once you add your collar and bodice lining.

Stitch very close to the edge of the fabric - about 1/16" or 1/8" seam allowance.

Do all the embellishing on the bodice before you start sewing the dress. That way your lining will conceal all the stitching on the bodice and you will have a beautifully lined top.

I did three pin-tucks on the skirt of the dress. You can do this by adding an inch per pin-tuck to the length of the skirt. So for this skirt piece, I added an additional 3 inches.

I used petite piping in the collar. You can make your own piping or used a packaged variety. Click HERE to view my piping tutorial and HERE to find out how to make your own custom piping.

I think its in the little details that make the difference between a nice dress and a truly special and unique dress. Back in the 50's and 60's, parents definitely valued quality over quantity when it came to clothing. It's fun to take the time to make something special for our little ones - they deserve it, don't you think?
I think "Jane" would have been proud to wear this dress and I think my little Savannah will love wearing this for Easter! She's already told me, "Mama, I love my beautiful dress." - what a sweetheart!
Thank you SO much for inviting me to participate in this lovely blog series, Katy! This was so much fun to put together this little look. I would love to have you all stop by my blog, The Cottage Home, and say hello - I love meeting new friends. Thanks for reading!
* * *
From Sheet to Chic! Marvelous, Lindsay.
Thank you for being here today!
This retro mom loves Dick and Jane as that is what I used to learn to read. Beautiful dress.
ReplyDeleteWarmly,
Tracey
Beautiful dress.
ReplyDeleteAnd I LOVE her shoes!!!
I love the use of vintage sheets and textiles, truly unique and one of a kind! Thanks for the tut!
ReplyDeleteI love this sweet, vintage style. I esp. love the striped piping. It is just beautiful!
ReplyDeleteadorable! that trim really makes it.
ReplyDeletesweet :) & all from a vintage sheet !!
ReplyDeleteImpeccable work! I've been following Cottage Home for a while and have yet to tell her how beautiful her work is.
ReplyDeleteSuch classic and clean lines. So precisely done.
Beautiful.
Beautiful work, Lindsay! You and Katy pay such close attention to detail! Love it!
ReplyDeleteThat dress is gorgeous, and it is complete just in time for Spring.
ReplyDeletethat is a beautiful and sweet dress. I love the way she did the embellishments! I hope to try this easter. Love it! Great job Lindsay.
ReplyDeleteFabulous Lindsay! This is gorgeous and I love the trim and the vintage sheet!!! So gorgeous!
ReplyDeletethis is great! what a neat technique--and excellent use of a vintage sheet. thanks for sharing!
ReplyDeleteThe details on that dress are amazing! Thanks for sharing.
ReplyDeleteHow lovely! I like the pintucks and the more decorated bodice. I think my vintage sheet is destined for a dress like this.
ReplyDeleteSo sweet!!! I have been looking around for some vintage sheets but haven't had much luck but will keep on trying. Just love this little dress.
ReplyDeleteI had those sheets on my bed as a little girl and they were vintage even then! Love this.
ReplyDeleteThis is an inspirational dress. Well done!
ReplyDeleteI love the dress made with sheets!! So amazing idea. Lovely!! You give-me good idea. Thanks!!
ReplyDeleteI love retro dresses on little girls. The use of the sheet is pretty retro too as my Grandmother used to tell me that she'd make my Mom's clothes out of her old clothes or old sheets. It's very Maria Von Trapp :)
ReplyDeleteI love this dress. One of my most favorite dresses that I made was made from a sheet like this. It washed so nice and got loads of compliments. I also grew up learning to read on the Dick and Jane books. I am a follower of yours and I love your blog.
ReplyDeleteSherree
http:www.chmitlinfamily.blogspot.com
I LOVE this dress. I saw the sheet on Lindsay's blog last week and never would have guessed what a beautiful dress it would become!
ReplyDeleteI love this Once Upon a Time thread....great idea Katy!!
I love Lindsay's work! This dress is so beautiful--I love all the detail work. Classic indeed!
ReplyDeleteThe fabric/sheet is beautiful. I especially love how you used the trims. What a sweet, classic look.
ReplyDeleteLove, love, love!!! I bought the Dick and Jane books just for the illustrations, and that inpsires a lot of the designs for my own Etsy shop. I also adore the fact that this came from a thrift shop sheet. Thrifting is like treasure hunting!
ReplyDeleteThis is sooo beautiful! I linked to your tutorial on Craft Gossip Sewing:
ReplyDeletehttp://sewing.craftgossip.com/tutorial-add-beautiful-detail-to-a-simple-dress-bodice/2011/03/23/
--Anne
That is the best dress ever!
ReplyDelete