Showing posts with label September Sewing Celebration '10. Show all posts

13 September 2011

Avalanche Tutorial

Thank you all for welcoming this sweet baby into the world!  Both Ryan and I were touched by the amount of people who have taken the time to email or comment.  He is still nameless.  We're working on it.  Don't worry, this is normal for us.  Also, I'm working on writing down his birth story.  HIS!  Still can't get over saying that.  And changing his diaper.

I will be bringing home my guest post tutorials over the course of bringing home my baby, starting with my Project Run & Play tutorials.  You know, a little something to keep you busy ;).  

***

Don't be intimidated by the mounds of fabric on this skirt.  It is a basic gathered skirt with a twist on the bustle.  In fact, it is similar to my Ruffle Your Bustle Tutorial with a few changes.

Let's start with the fabric I used.  This is actually a blanket from IKEA.  If you don't live near an IKEA, perhaps you have a nice relative who does?  It is the OFELIA BLANKET made of 80% polyester and 20% acrylic [it is not the OFELIA throw, which has wool in the fiber content, so check, if you're uncertain].  It is stretchy, but forgiving, because it hides mistakes really well ;).  

For the front of the skirt I used a FLANNEL BACKED SATIN, a yard and 1/3 should do it, depending on the size you're making.  If you have never used flannel backed satin, you are in for a treat.  It makes wonderful pajama bottoms, as you still get that slickslideinyourbed feel on the outside, but the cozybyafireplace feel on the inside.  It's also not as fussy as regular satin.
For the back panel base, I just used some polyester lining, but on the thick side, as it will be holding a lot of weight.  A mid-weight cotton would also work fine.
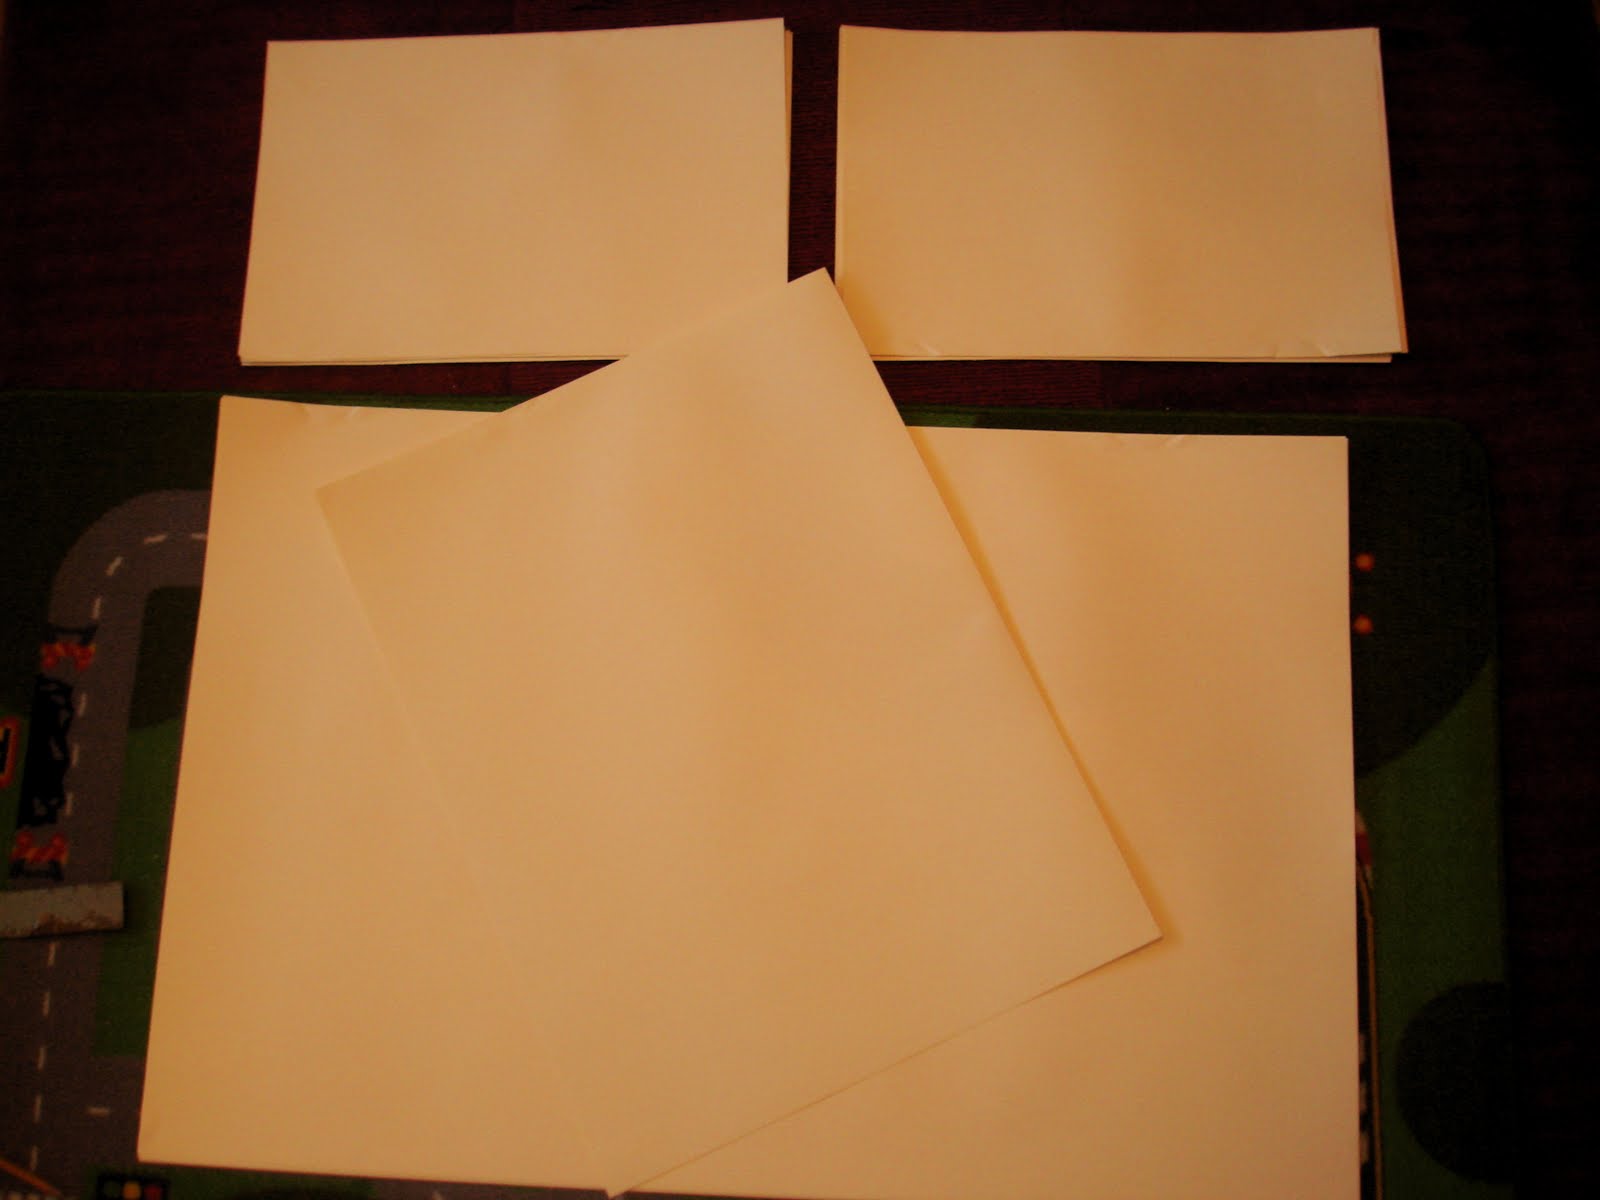
This shows the back panel, folded in half.  For a size 6 and bigger, use a width of 32".  Any bigger and you'll have to buy more than one blanket.  Adjust the width and length according to your child, including seam allowance of 1/2" on each side plus 1" for the waist.  Round the two bottom corners and open it up.

Next cut the layers of the bustle.  Each layer is folded in half, hotdog bun style, so cut them accordingly [for example, each of my layers is about 2" longer than the previous one, so layer one is cut 10", layer two is cut 14", etc.]  The last layer is significantly larger.  Pin each layer across, slightly slanting them on each end to match the curve of the base fabric.  Sew, starting from the bottom [narrowest] layer, flipping the other ones out of the way as you sew.
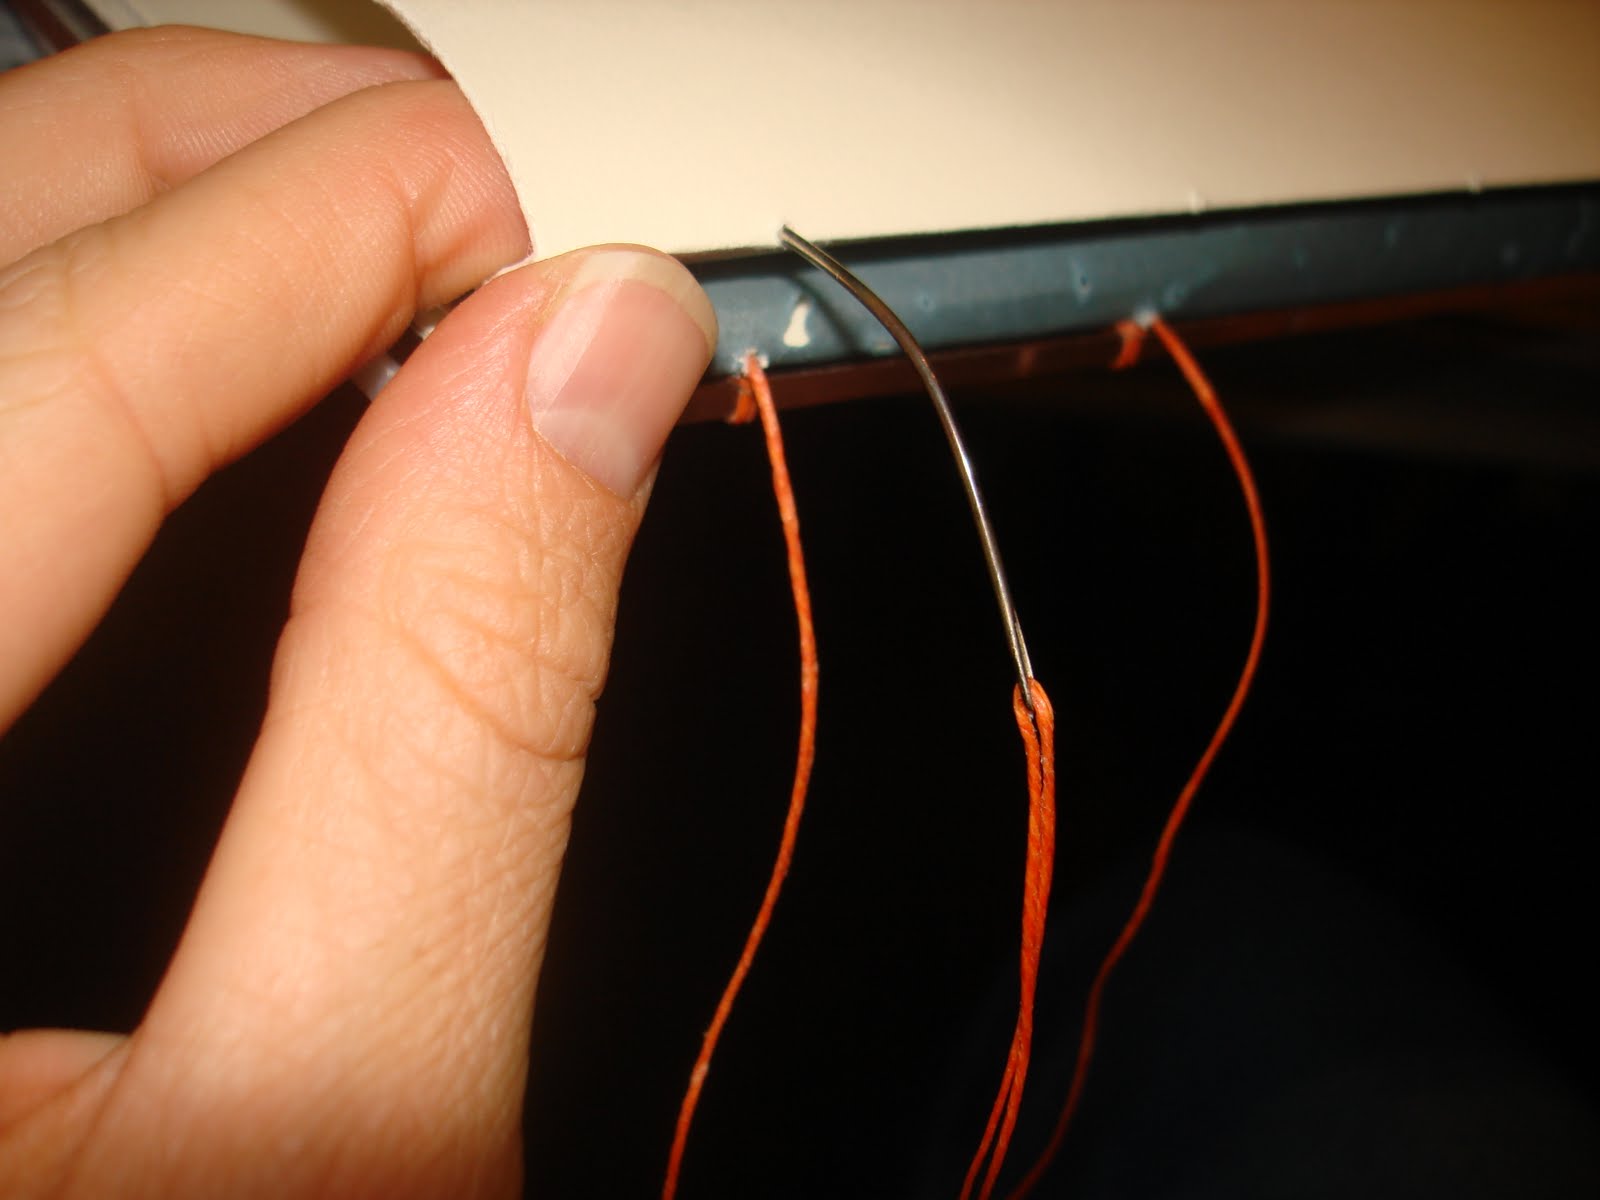
Next comes the scalloped edges of each layer.  I experimented many different ways and found it was easiest to do this by hand.
o1  Using a double stranded thread or a single thicker thread, tie a knot and loop around the folded portion of the layer [obviously, though, you'll use a matching color thread.]
o2   As long as your needle is, weave it back and forth, perpendicular with the fold.
o3  Continue until you reach where you've sewn the layer onto the base.
o4  Pull thread to create the scalloped edge and secure with a knot.

I did the most amount of scallops on the bottom layer and did increasingly less the closer I got to the waistband.  Make sure you also gather each end of the layers.

 Next comes the gathering.  I also tried several methods and found the best was to gather it with a cord.  If you've never used this method, don't be afraid ;).  What you need is a foot with a groove on the bottom.  This one is my baby pin tuck foot, but a lot of invisible zipper feet have grooves as well.  The cord is nylon which makes it easier to gather, as it slips easily through the thread, and can be found by the piping in fabric stores.  It doesn't really matter what size you use, as long as it slips under and is guided by your presser foot.
All you do is feed the cord through the groove of your foot and zig zag stitch back and forth over it.  Just be careful not to stitch through it or you won't be able to gather the fabric.  Leave a few inches on either side of cord.  Once you zig zag across the entire top of the bustle panel, tie a knot on one end of the cord and push the fabric as much as you can to gather it and tie a knot at the other end.  Leave the cord ends hanging out [we all like a little time to hang out, right?], as you will sew them in the side seams for extra stability later.


I used about 1 1/3 yards for the remainder of the skirt.  Fold the top down 1/4" and press.  Fold it down again 1" and press and stitch along the first fold.  This creates a casing for the elastic.  Insert 3/4" wide elastic using a large safety pin attached to one side and gather the front panel.  Pin to the bustle and try on your child for fit. 
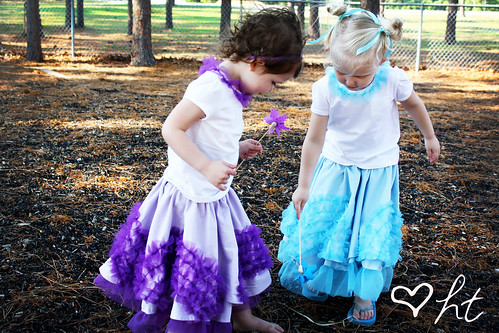
Next pin and sew the 2 side seams, making sure you catch each layer of the bustle, the cord you used to gather the bustle, and the elastic--everyone wants in on this one.  Hem by folding under twice and stitching.  And there you have your very own Avalanche Skirt!  If you have any further questions or need clarification, don't hesitate to contact me over at my blog.
 ...girls in white dresses with blue satin sashes...
Does it make you want to watch The Sound of Music? ;)

30 September 2010

Final September Sewing Celebration Recap

Winners: If you haven't heard from me, I don't have your contact information. Please send me your email address [sewapropos@gmail.com]

* * * * * * * * * * * * *
This sad day has come. The last day of September Sewing Celebration, in honor of National Sewing Month, although it seems rather silly to lament something I will continue [though not with the intensity and frequency this month has demanded.] It's been a busy, but rewarding 30 days. I've gotten most my family members to participate, I've had such a fun time offering these amazing giveaway prizes and I've made new friends, for certainly it wouldn't have had the affect on me it did without actual people reading and commenting as I went along. So, thank you to my family who shared their talents. Thank you to all those who donated such marvelous wares for the giveaways, and thank you dear readers for playing along and leaving your kind words here.

This is the last day to enter all the giveaways for the month. They are all separate, and you must leave your comments on the respective post to be entered.

My weapon of choice. Ginghers.
Winner: Julia, stop cutting bags of Sister Schubert's rolls open with your sewing scissors!

Instructor of choice: Oliver + S. The new School Photo Dress pattern.
Winner: Mere Catholic, I also hope Oliver + S makes women's patterns one day.

Decor of choice: Stained glass stars. And in honor of my September Sewing Celebration, they've created a fabric backed line of stars!
Winner: Anna, glad you're as fond of my dad's stars as I am.

Subscription of choice: Ottobre Magazine.
Winner: Ginny, you can cross this off your wishlist!

Fellow blogger patterns of choice: Jessica of Happy Together.
Winners:
Indigo Bleu Photography, what lucky clients you have!
and Sheryl & Ben, I'm assuming Sheryl is the one who entered.
The Twirl n' Go Skirt Pattern by Happy Together

and Danielle of my sparkle.
Winners:
Peta, you can cut back on your stain soaker!
Carly, you must go out and get some of your own checkered pleather!
Amber, I think you might love it even more on your little one!

Fabric of choice: ruffles and ruffles.
Winner:
Hurst Family, although I don't think an entire family will fit in one skirt ;)


Felt of choice: Purl Soho.
Winner:
Melanie, lichen it is!


Japanese literature of choice: Japanese Pattern Books.
Winner:
Meagan Shuttleworth, glad you're getting lots of sewing done!


From my other weapon of choice: $100 sewing paraphernalia gift bag.
Winner:
haysie-doodle, so pleased you're a fan of paraphernalia, too!

And one last giveaway. From me to you.
Post photos of what you've made inspired by no big dill on the flickr group, or link to a post of something new you've done this month. For a chance to wear my hard work [orange turquoise!]:
Winner:
Natalie@our old southern house, you've been hard at work!

Bernina Giveaway


Yes. I'm posting again. And you'll hear from me one more time today. It is the last day of September Sewing Celebration <:(. Thought we'd end it with a bang: Bernina is offering a gift bag full of sewing paraphernalia valued at $100! You know my feelings on Bernina [see photo]. Jump here to leave your comment to enter the giveaway. Winner announced tomorrow!

Learning Japanese [kind of]


Don't you love it when your child finds their passion?  When it's not just "a phase" and they truly love something?  Pearl found hers early. Horses, horses, horses. You should see her equestrian collection. Sally, Blackie, and Jack are her favorites. When I was deciding what to make from my newly purchased Japanese Pattern book, I had Pearl in mind for a some fresh threads. But really, I could spend all my time salivating over the striking photos, the smart, earthy fabric choices, and simple, yet stunning designs.


When I turned to the page with the hooded cape, I started imaging a neutral wool with a bright lining, like a filled donut! I pulled out some brown wool twill and bright turquoise fine-wale corduroy with embroidered horses. I knew they would make a beautiful union. I pictured Pearl wearing her cape, the hood flying off as she galloped on her steed through some damp woods.  I've fulfilled the cape requirement, now about the horse...

Here's a brief how-to on reading Japanese patterns [I know, I know, again with the foreign patterns!]


Once you decide on the article of clothing from the pictures [1], turn to the corresponding page [2], both of which are lettered [with OUR alphabet-hooray!] In the back of the book are the pattern pieces [3]. Usually there are 2-3 large sheets [4]. Find the sheet that lists the letter of pattern you are using. All the patterns I've ever made have the pieces limited to a single side of a sheet. Trace all the pieces labeled with your letter [5]. I use freezer paper, available at grocery stores. Draw on the non-waxy side.

You will need to add a 1 cm seam allowance to the pattern pieces, unless the diagram directs differently, for example along the hem you add 2.5 cm, and on the pieces that are on the fold you don't add any additional amount. Any geometrical shaped patterns are not included, and you'll measure and cut them out without a pattern piece [see the piece cut on the bias below]. The dotted pieces have interfacing. The dashed line denotes the fold of the fabric. The number of pieces needed to be cut is in parenthesis. Label all your pieces with information such as the particular clothing pattern, the size, the grain line, the amount of pieces to cut, and if it is to be cut on the fold. From there, you sew it up like any other regular pattern, except with a 1 cm seam allowance, or 1/2".  It is helpful to have a basic knowledge of clothing construction and studying the diagrams will aid in figuring out how to sew it up.


Sally, Cash, Pearl


Cash trying to eat my lens


Cash wonders, "Want to sew your own Japanese inspired clothes?!?"


You have one day and one day only to leave a comment to win a Japanese Pattern Book!

Pinknellie's Etsy shop is giving away one book [the one pictured at the top which includes both boys and girls clothes] to a clever commenter. I'd like one of each of her yummy selection. Check them out and leave one comment here. It's also nice to know how to contact you. Winner announced tomorrow!!

29 September 2010

Scalloped Table Cover Tutorial


No matter how many times we tell our girls "YOU ONLY DRAW ON PAPER!" their handwriting or artwork appears in unwanted locations: e.g. the house. I will admit, now that Pearl writes her name the correct way, I hesitate to scrub her scrawled signature off the wall. I also love how children are innocent enough to sign their name to their graffiti.  But it's usually not so cute. 

We purchased a table for the art room with legs we can change out to use as a taller desk. We moved it to the kitchen, however, and moved the table to the harp room and the harps to the living room. Why? Because the kids are in the kitchen no matter what. So, instead of having everyone clear off their homework and projects when it's time to eat, I set the table elsewhere. Meanwhile, I'd like to hang on to this table for a while and want to keep it looking decent. This is tablecloth number 3 and we're doing great so far.
Print this 2" scallop template on heavy cardstock, or use a glass or can to trace, though having a template makes a project with this many bumps not so bumpy. 
[Somehow, my scan didn't keep the original scale, so print at 130%, just the first page.  Me and technology.  Sheesh.]

Measure your surface and purchase some vinyl fabric found in the upholstery section of the store, a few inches larger to accommodate the hanging edges of the table cover. I looked for some green to match my countertops, but was not so successful. Remember how I had to go to Korea to find the perfect shade of nail polish to paint the cupboard knobs? So I opted for a contrasting, bright red.

When buying your fabric, kindly ask the lady at the cutting counter to ROLL your fabric. You will have unnecessary ill feelings toward her later if you don't and she does fold it, leaving creases that will eventually come out...months later.  This was $9/yard [I bought 1 yard and used a coupon for 50% off.]

This one comes with a clear layer that protects your vinyl until ready to use. Leave it on if you like, I peeled mine off, as it also creates bubbles on the surface. Lay the vinyl wrong side down on your table. Pin your corners where they fit snugly [right triangle]. These will be sewn later. Mark the entire perimeter, measuring down from the table top. I kept mine short [8.5 cm], so the chairs and kid legs still fit under the table upon completion, as well as accessing the drawers underneath. Mark scallops with a pen/fine sharpie. Cut very smoothly with a small pair of sharp scissors that clip all the way to the end of the blades to get crisp valleys in your scallops. Sew the 4 pinned corners, trim the excess vinyl and turn right side out. A delightful byproduct is a whole bunch of cute crowns. Zig-zag stitch together.

Set with some after school snacks, colorful pencils and watch your children gracefully ease into doing their homework!


28 September 2010

Sewing Paper: The Coptic Bound Book

Remember my Chinese book I was holding in the Coastal Curtsy Tutorial? Well, today we get to learn how to make it!!! Yes, my sister actually made that book. Let me introduce her.


So, we've heard from all my sisters[-in-law] except for my oldest. [Not that she's old--just by 3 years :)]. I am so pleased she agreed to play along with September Sewing Celebration! Ashley [the one in the green sweater--and whose bump is now a sweet little girl] is the mother of two little cuties: Eli and Ivy. She teaches art at Brigham Young University and I'll bet her students adore her. She is down to earth and an earth lover. She has no facade. What you see is what you get, which I love and admire. Today she is here to share her sewing abilities.

* * * * * * * * * * * * * * * * * * *

Coptic Bound Book


I have 10 sheets of MOHAWK SUPERFINE (wouldn't that be a great band name!)

It is 38" X 24" and I divided it into quarters by folding and then tearing. This gave me 40 sheets of 19" X 12" pieces of paper.


I divided those sheet into fives stacks with 6 pieces and two stacks with 5 pieces
(uneven I know!)


I then folded those pieces in half to create what is call a "signature". A signature usually has anywhere from 4-7 sheets of paper which have been folded in half and placed inside each other. A book is made up of many sections or signatures.


The signatures were stacked on top of each other and then compressed by UTAH for a day.


There are many options for the cover. You could purchase bookbinding board and cover it with bookbinding cloth or ornamental paper. You could use a thin piece of wood or metal. I chose a piece of plexiglas. Your cover needs to be slightly bigger then your folded signatures. My signatures were 9 1/2" X 12" so my two pieces of plexiglas ended up being 9 3/4" X 12 1/4". The place from which you purchase you plexiglas will usually give you 2 free cuts.


Then I chose a piece of decorative paper just slightly wider then my signature so it could be folded over the edge where the book will be bound and sewn.


I then decided where I wanted the holes in my book cover. The only requirement there is that there be an even number of holes. You could even place them in a zig zap pattern if you desire! I then drilled the holes by placing the plexiglas over a piece of wood. I used a 5/64" drill bit. Be sure to keep the two piece (front and back cover) together while drilling so the holes line up when you sew the book together.


Now you want to translate the position of those holes in you plexiglas to your stack of signatures.


I made a pencil line along what will be the spine of the book.


Now it's time to play with fire! You can purchase curved bookbinding needles or you can make your own by taking a pair of needle nose pliers and holding the needle in the flame of a candle for about 30 seconds. With another pair of pliers you bend it slightly. You will need two needles. Clean off your needle under cold water holding it with the pliers so you don't burn yourself.


Next make a template with a scratch piece of cardboard or paper that is the same length as the spine of your book. Make marks on the template that correspond with the marks you drew along the spine.


You will then open all 7 of your signatures and draw dots in the "gutters" of those signatures to let you know where to poke holes that correspond with the holes in your cover.


The best way to poke these holes is with an awl. But I couldn't find mine so I use my pliers and a needle. I placed the signatures in my lap with the crease laying between my legs and carefully poked the holes.


Stack the signatures back together along with you decorative paper you have chosen for the front and or back of your first and last signatures.


Now we are ready to start sewing. Bookbinders use a special kind of waxed sewing thread found in an array of beautiful colors. (Online thread source)
You will need about a yard for each hole in your cover.


So to begin thread your two needles each with a yard of thread. Open your first signature and pass your first needle through the first hole and your second needle through the second hole.


Pull them to the end and then tie the ends together.


Next thread each needle through the corresponding hole in the book cover. The needle is threaded into the front of the cover and then pulled from the inside of the cover toward the spine. Bring the needle back toward you so that the thread is now between the inside face of the cover and you first signature.


Notice that the longer thread is on the left. It is important to be consistent with each sewing station. Pull the thread taught and then cross your thread over the thread that is now connecting your cover and your first signature. Take the need in between the cover and signature and go back into the hole of you cover. Pull the thread out of the outside of the cover until a small loop is formed in between the cover and first signature. If you pull the thread to tight and lose the loop, simply use the needle to pull the thread loose again until a loop has formed.


Thread the needle through the loop from below. Pull the thread taught and then thread the need back into the first signature. Do this with both sets of needles at each of their respective sewing stations.


You now should have both needles each coming out of the first two holes or sewing stations of the book. Now you will cross each needle over to the other hole and go back through the signature. Be careful not to split the threads as you go back through the hole.


Place a new signature on top of the first signature. Thread each needle directly into the hole of the second signature.


Once both needles are inside the second signature you will cross each thread to the other hole and thread it back to the outside of the signature as you did with the first signature.


Now bring the needle between the cover and the first signature and go behind that sewing station (in from the left and behind the sewing station and back out towards you from the right) Pull the thread tight. Be consistent always working from left to right. This is the link that attaches the signatures together and produces a herringbone pattern in the sewing.


Now things just repeat. Place the third signature on top. Thread needle directly into signature. Cross each thread to the other hole and back to the outside of the signature. Bring the thread between the first and second sections going in from the left and wrap around the sewing station and come out the right. Pull thread tight and then add the fourth signature and repeat.


The herringbone pattern will become more evident as you proceed! Keep the tension of the thread consistent to make the herringbone pattern develop nicely.


After the last signature has been sewn and linked to the section below, take the cover and place it on the last section. Thread each needle into it's corresponding hole on the cover board. Going in from the outside of the cover.


Bring the needle back towards the you and wrap around the sewing station and the up through the inside of the cover.


It will once again create a loop that you will place the needle through. Then pull the thread taught.


It tightens best when you pull straight down.


Insert the needle between the 2nd to last and last signatures on the left of the sewing station. Wrap it around and back out on the right (this is not pictured). Then insert the needle into the last signature, careful not to stab the thread already in the hole.


Pass the needle under existing thread in the gutter of the signature. This will produce a small loop in the thread. Place the needle through the loop and pull it tight. This will create a simple overhand knot.


Trim excess thread.


Repeat the long process for each pair of holes in your book.


There you have it, your very own hand sewn book!

* * * * * * * * * * * *

I will give the first person to make their own hand sewn book extra credit.
Seriously.
Thanks, Ash.