Showing posts with label Candy Corn Week. Show all posts

30 October 2010

Final Candy Corn Project

A few weeks ago the brake lights on my car weren't functioning very brightly.
I took a trip to the car parts place and for five bucks picked up some new bulbs and some free labor.
Lights installed and still no success.  Turns out to be an electrical problem valued at several hundred dollars instead of just a few.
Yesterday I went to have the oil changed.  I brought Olive and Ryan for back-up because those guys always convince me to fix this or that.
 Turns out my little Vanessa [that's what I just named my car] needs even more several hundreds of dollars sunk into her.  
How does this relate to Olive's Candy Corn Skirt?  
There happened to be a plethora of orange photo op spots in the neighborhood.
And in case you're confused, Olive's skirt is not such a blatant candy corn copycat like my other projects. 
I went the route of interpretation and creative license based on the chocolate candy corn.
 I let Ryan be in a shot since he happened to dress color coordinated with his accessories.
So, the upside of this car news: I got a photo shoot out of it that was free.

Thank you for indulging me in my Candy Corning.
Want to see all the projects together?


Pattern: Oliver + S
Fabric: Upholstery remnant and variegated wale corduroy


25 October 2010

Candy Corn Costume

So.  Back to Candy Corning.  
[If those who assemble scrapbooks can make it a verb, I reserve the right to do the same.]

Do you need an easy costume to whip up?  All this is, is an A-line jumper cut unto three sections out of felt, finished with bias around the neck and arms, buttons as closures.


The conical confection cap is cut from some foam board, taped inside with duct tape [real classy, I know].


On the outside, I used tiny brads to really keep it together by poking a hole with my little scissors first, then inserting and opening the brads.  I also attached an 1/8" elastic for the chin strap by tying a knot first and poking the brad through the center.


This was what inspired my Candy Corn projects.  When Olive was a baby, two of my friends also had 2-month old infants.  One of them suggested we dress them as a trio of candy corn, so I made identical candy corn costumes for all 3. 


Believe it, or not, this is the exact same costume.


I told Azure, no way are you going to be able to fit in that.


I was wrong.


She was happy.


And happened to have some matching shoes.

That's my girl.

06 October 2010

From Corny to Classy

The kids were in bed, Ryan was preparing for his class he was to teach the next day and I was sitting quietly beside him making candy corn beads. He finished up and scooted closer. I somehow convinced him to join in my project. "Too bad we already brushed our teeth," he says as he rolled the second or third candy corn carefully on the table. "Why?" "Because I'd like to eat some candy corn now."

This. This coming from a man who will have nothing to do with candy. He asked me to pick up "some meat" from the grocery store one day. "What kind do you want?" "Oh, it doesn't really matter, just some meat." Me, "Ryan, that's like me sending you down the candy aisle to pick up something that looks good." "Oh." Yeah, oh. So, I figured this project to be a complete and utter success when Ryan craved candy corn. I hadn't even completed it. Happy.
When I was in middle school, I used to make tiny converse earrings out of clay. I'm glad I found a pair to show you. My dad made me approach potential stores all by myself, which was much worse than asking for condiments at the fast food restaurant by myself. I loved making anything miniature. Apparently, I still do. The smaller, the better.

Materials:
24 gauge wire
Wire cutters
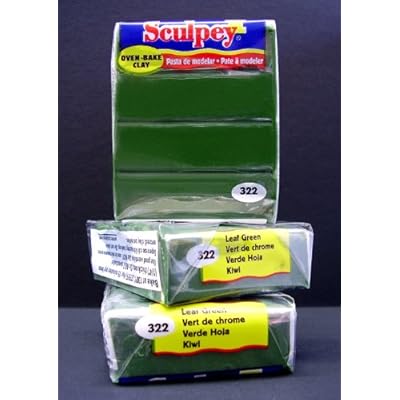
Sculpey III
(I've tried other polymer clays before, but I always come back to this one)
Small nail
Oven


Cut the wire into 1" pieces. Fold over the nail, cross the ends over each other and twist the rest of the way down.
Take 3 small pieces of yellow, orange, and white clay, about the size of the studs you first wore when you pierced your ears. Remember how boring those were? Stack them together and roll in a cone shape. Insert wire loop.

Bake at 250 degrees Fahrenheit for 10-20 minutes (I did mine just 10, as you DON'T want these golden brown, which I have mistakenly done before.)

They kept getting smaller and smaller and smaller and smaller. I'm going to use Monday's tutorial for these sweeties.
And, I shouldn't have my blood sugar checked anytime soon, although I managed to miss more than I made it.
So if you notice everyone getting out their Halloween sweaters and you turn to your closet to find that you don't indeed own a Halloween sweater, do not worry. You're keeping Halloween classy with your Clustered Candy Corn Necklace.

05 October 2010

TNHSOCCTOT Bag...I think it needs a new name.


So where do you put all that candy corn?
Why, in a candy corn bag, of course!

There's a trick to make this stay open.


Go over to Christie's A Lemon Squeezy Home Purse Week for the tutorial. And while you're there, enter her contest for some mighty generous prizes!


04 October 2010

Conical Confection Craving!!


I don't care if you like them or not. Yes, there are better things to put in your mouth, but the Candy Corn is undeniably the quintessential Halloween candy. Am I right? When we were little we used to break off the white tips and try to play some trickery on any listening ear that we had lost a tooth. I think I actually believed it myself. So, I am doing a little homage to the conical confection. This week will be all projects Candy Corny. Want to play? Post your photos in a big dill flickr group.


Only a nickel for a handful of candy corns?
Looks like someone already played my lost tooth trick we these.

What you'll need for candy corn project 1, the spooky pendant:
Empty pendant
Diamond Glaze
Small drawing of something spooky
Glue

The pendants come in all shapes and sizes. Some hints: the square/rectangle ones are much easier to fit your drawing in, but the round ones are awfully fun to use. I used crayola markers on my first drawing and filled in the black space with a sharpie. The crayolas did bleed a bit, but I like it in this case. The sharpie did not bleed at all, so use fine tipped sharpies if you're looking for a crisp design. Some ideas: candy corn [of course!], witch hat, spider, spiderweb, ghost, burning candle, jack-o-lantern, black cat.
Cut out your drawing and glue it inside the pendant. Take your time and trim just small amounts at a time until it fits just right, because gaps will show.
Tip bottle of diamond glaze over and let any bubbles drip out before filling pendant.
I like to have a convex coating, so it sits slightly higher than the pendant. Let dry overnight. If the diamond glaze dries concave, go ahead and add some more and let it dry again. If the pendant doesn't sit flat on the surface, put on a plate with the bottom edge resting where the plate slopes up so the glaze dries without slanting.
Now be creative how you use your sparkly new pendant! A keychain, jewelry, on a hair clip or Halloween costume.
Don't forget to check out what is going on over at Christie's A Lemon Squeezy Home Purse week. I'm making a guest appearance tomorrow. I'd enter a purse if I were you. Amazing prizes to be won!